Monitor Mount for 2 Stacked Monitors: Dimensions, Ergonomics and the Right Choice
In this article
In short
Stacking two monitors saves half the width.
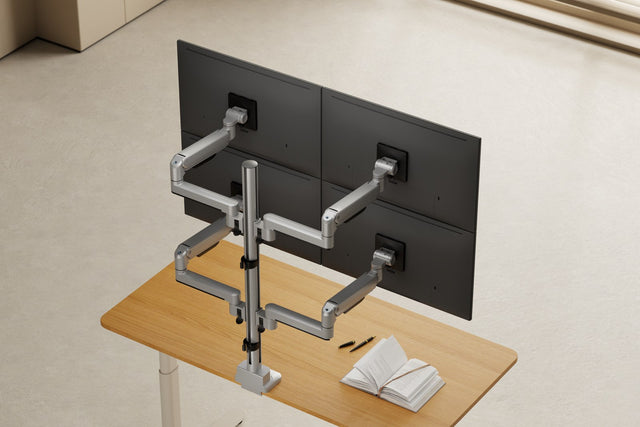
At 24 inches, the monitor wall is only around 55 cm wide but about 65 cm tall. The bottom monitor is your work screen and sits as low as possible; the top one shows what you only check now and then and is tilted forward. For this you need a pole of around 90 cm.
Two monitors stacked on top of each other only take up the width of a single monitor. That works well when one screen carries your main work and the second shows what you only check now and then. Here you'll find the dimensions by monitor size, the rules for a healthy posture, what matters in the monitor mount and three ready-made configurations.

Stacked or side by side?
The German Technical Rule for Workplaces ASR A6 "Screen work" gives a clear guideline: if you use several screens equally often, they should sit close together side by side. If you mainly use one, it belongs centrally in front of you (section 6.3.3). Two stacked monitors fit exactly the second case: the main screen sits centrally in front of you, the second one above it – instead of turning your head to the side, you briefly look up.
| Feature | Side by side | Stacked |
|---|---|---|
| Width at 24 inches | approx. 1.1 m | approx. 55 cm |
| Height at 24 inches | approx. 32 cm | approx. 65 cm |
| Head movement | left and right | up and down |
| Ideal if | you use both monitors equally often | one monitor is your main screen |
| Pole (3IDEE ONE) | 50 cm | 90 cm |
How we calculated
Approximate values for two 24-inch monitors in 16:9 format with slim bezels, measured without gaps between the screens. The screen height results from the diagonal and aspect ratio (24 inches: 29.9 cm), plus 1.5 to 3 cm of bezel depending on the model.
Stacked works if
- your desk is narrow or sits in a niche and two monitors side by side don't fit,
- one monitor is clearly your main screen,
- the top screen shows things you just want to keep an eye on: chat, order book, documentation, email or camera feeds.
Side by side is better if you constantly work back and forth between both screens, for example when comparing two documents, or if you look at the second monitor for many hours a day.
How tall are two stacked monitors?
What counts is the height of the screen, not the diagonal. Two stacked monitors are a good bit more than twice as tall as one. Add the gap between the desktop and the bottom monitor – calculated here at around 8 cm.
| Monitor | Height of both monitors | Top edge above the desk |
|---|---|---|
| 24 inches (16:9) | approx. 63–66 cm | approx. 71–74 cm |
| 27 inches (16:9) | approx. 70–73 cm | approx. 78–81 cm |
| 32 inches (16:9) | approx. 83–86 cm | approx. 91–94 cm |
| 34-inch ultrawide (21:9) | approx. 70–73 cm | approx. 78–81 cm |
How we calculated it: screen height from diagonal and aspect ratio (24 inches: 29.9 cm, 27 inches: 33.6 cm, 32 inches: 39.8 cm, 34-inch ultrawide: 33.6 cm), plus 1.5 to 3 cm of bezel per monitor depending on the model. The dimensions in your monitors' data sheets are what count.
For comparison: when you sit, your eyes are roughly 40 to 50 cm above the desktop – depending on your height, chair and desk. So the top edge of two 24-inch monitors sits 20 to 30 cm above your eyes. That's why the top monitor gets the supporting role.
Tip: plan for a 2 cm gapIf you want to tilt the top monitor forward, leave around 2 cm between the two monitors. When tilting, its bottom edge swings back and down and would otherwise hit the bottom monitor. With two 24-inch monitors, that makes a total height of about 67 cm.
Which monitor size?
Our recommendation: 24 or 27 inches. At 32 inches, the top monitor reaches more than 90 cm high, and you look at it with your head clearly raised. Two stacked 34-inch ultrawides are about as tall as two 27-inch monitors, but around 80 cm wide – that works if each one, without stand, weighs no more than the mount can carry.
The monitors don't have to be the same size. Put the larger one at the bottom. A smaller monitor on top lowers the total height, and you have to look up less.
Ergonomics: work at the bottom, check at the top
ASR A6 recommends a line of sight tilted about 30 to 35 degrees downward and a viewing distance of at least 50 cm (sections 6.3.2 and 6.3.1). The German Social Accident Insurance's DGUV Rule 115-401 sums it up: keep the screen as low as possible, the top line of text no higher than eye level. The bottom monitor can meet that, the top one can't.

Here's how to make the most of it anyway:
- Set the bottom monitor lowThe bottom edge sits just above the keyboard and desktop. That way you look slightly down at the main screen.
- Main work at the bottom in the middleWhat you need all the time goes on the bottom monitor, directly in front of you.
- Tilt the top monitor forwardTilt it far enough that your gaze meets the center of the screen roughly at a right angle. That reduces reflections and the bend in your neck.
- Same distance to bothKeep both screens at least 50 cm from your eyes and as equally far away as possible.
- Readjust after a weekOften the top monitor then ends up a few centimeters lower or closer. With a spring arm, that takes no tools.

What goes on top, what goes at the bottom?
The rule is simple: what you work on goes at the bottom. What you only check goes on top. Two examples:
Example: trading
- Order book, watchlist & news
- Main chart & order entry
Main screen
At the bottom, you make decisions; on top, the context runs. A glance up is enough, without losing sight of the chart.
Example: programming
- Documentation, browser & logs
- Editor
Main screen
The code stays at the bottom in front of you. On top are references and output that you only check briefly.
What matters in the monitor mount
1. A pole that is tall enough
For two stacked monitors, the pole has to hold the top monitor securely at the height from the table above and still leave some reserve for adjusting. At 24 and 27 inches, the top monitor's mounting point sits about 55 to 65 cm above the desktop. Short poles, as is usual for two monitors side by side, are often not enough. It helps if you can set the height of each monitor on the pole.
2. Weight, VESA size and desktop

For each monitor, check the weight without stand and the VESA hole pattern on the back, usually 75 × 75 or 100 × 100 mm. Both monitors hang on one pole and therefore from one point on the desk. With soft desktops, honeycomb-core panels or glass, a reinforcement plate belongs under the clamp.
Do your monitors fit? Enter the brand and model. The Setup Finder shows you the VESA size, compatible mounts and the accessories you need.
3. Fixed or movable
A fixed mount is enough if the monitors stay where they are after setup. A spring-assisted arm is worth it if you change the position more often: for sitting and standing, when several people use the workstation, or to pull the monitor closer. The arm pays off most on the bottom monitor, because that's the one you work on.
Three ready-made configurations with 3IDEE ONE
To be upfront: 3IDEE ONE is our own system. That's why you'll only find specifications here that you can check in the data sheet – and further down, when it's not the right choice.
All three configurations stand on the same 90 cm pole. They differ in how much you can still adjust later. The link opens the configuration in the configurator, where you can still change every part.

1. Both fixed to the pole
The most affordable option if little changes at your workstation.
- You set the height during setup
- Tilting and rotating still work
- The monitors sit close in front of the pole
€139incl. VAT
Open configuration
2. Spring arm at the bottom, fixed on top
The best choice for most people: the main screen is the one you adjust most often.
- Pull the bottom monitor closer or push it back with one hand
- Set it up to 20.5 cm higher or lower
- The top monitor sits fixed on the pole
€209incl. VAT
Choose in the configuratorIn the configurator, choose "Directly on the pole" under "Top monitor".

3. Both on spring arms
For shared workstations and frequent switching between sitting and standing.
- Adjust both monitors independently with one hand
- Pull the top monitor forward too
- Each arm up to 20.5 cm higher or lower
€269incl. VAT
Open configurationPrices according to the configurator, as of Nov 11, 2026, including VAT.
The specs
| Feature | 3IDEE ONE, two stacked |
|---|---|
| Monitor size | 17–40 inches per monitor |
| Weight per monitor | 2–12 kg, curved monitors 2–11 kg |
| VESA | 75 × 75 and 100 × 100 mm |
| Desktop | 10–50 mm, clamp or through-desk mount, no drilling |
| Pole | 90 cm tall, Ø 52 mm, 787 mm of adjustment range |
| Height at the spring arm | adjust up to 205 mm, with one hand |
| Tilt / rotate | +75° / −45° · ±180° (portrait too) |
| Changing monitors | quick-release plates to hook in and out |
| Material | aluminum, metal on all load-bearing parts |
| Warranty and trial period | 25-year system warranty, 60-day trial |
Source: data sheets of the monitor mount for 2 monitors and the base with 90 cm pole, as of Nov 11, 2026. Terms: warranty and 60-day trial.
When 3IDEE ONE isn't the right fit
- Heavy monitors: above 12 kg per monitor without stand (curved above 11 kg), it's the wrong choice.
- No VESA 75 or 100: if your monitor has a different hole pattern or none at all, you need a matching VESA adapter or a different mount.
- Thick desktops: above 50 mm, neither the clamp nor the through-desk mount fits.
- Monitor on the wall: without a desk or with very thin desktops, a wall mount is the better solution.
- Tight budget, never adjusting: simple freestanding stands are cheaper. If you never move the monitors after setup, a stand like that is often enough.
Grows with your setup
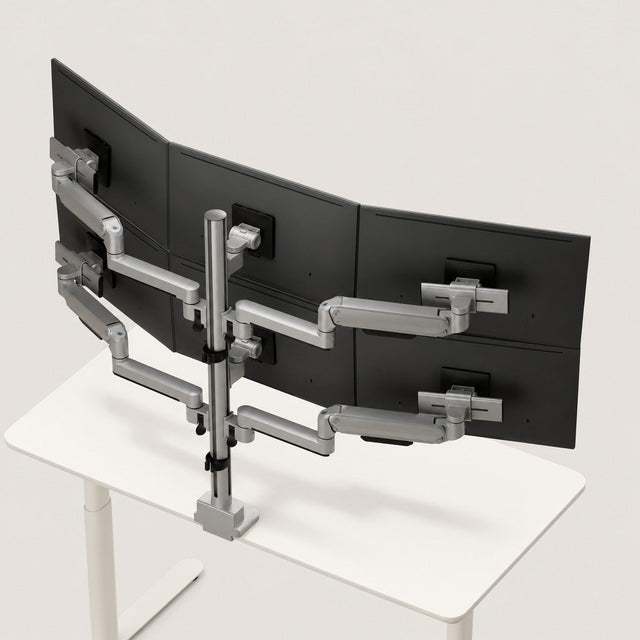
3IDEE ONE is modular. On the same 90 cm pole, adding more arms turns two stacked monitors into four, two over two. How the system works
Cables and connection
Your computer needs two free video outputs. For laptops, the data sheet says how many external monitors they can drive at once – MacBooks with a base chip sometimes only manage one; Apple lists the exact number per model, for example for the MacBook Air.
Measure the cable route from the computer over the pole to the top monitor: it's often 40 to 50 cm longer than to the bottom one. Run the cables down along the pole and leave some slack at the arm so no plug gets pulled when you adjust.
Ready for two stacked monitors?
Check off what you've already sorted out. If something is missing, you'll find the answer above.